Preventing Release Problems:
A tap of the mold and picture cookies should fall out of a well seasoned, dusted mold.
IF the dough hangs up in the mold cavity, try the following:
1 - Use a large mass of dough that it is not stretched too thin in the process of making it fill the cavity.
2 - Push back (round) the outside edges of the dough where it fits into the mold cavity. Slightly separating the outer edge of the dough (while in the mold) from the mold itself is done by a bit of "finger patting."
3 - Use more dough than is needed to fill the cavity-- produces a thicker cookie that will release more easily.
4 - Slam the mold against the counter with greater force. Experiment with hitting the top vs. bottom of the mold.
Instructions for Molding Cookies
in Deep Cavity Molds
A - Dust the mold cavity with powdered sugar.***
Remove excess sugar and save for redusting mold.
B - Press a portion of chilled dough into the cavity.
Cut away excess dough.
C -Holding your hand at the top of the mold,with the dough-filled cavity facing down,slam the bottom edge of the mold against the work surface so as to cause the cookie figure to loosen and release.
Some molds may require your guiding the partially released cookie to the cookie sheet.
***Some cookie bakers prefer use of rice flour or corn starch.
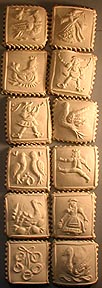
Deep Cavity Molds work best with recipes that include a liquid sweetner such as molassses or honey. This subject has been researched and is fully explained by Anne L. Watson is her book described below:

Hand Carved Picture-Cookie Molds
Preventing 'Release' Problems when using deep cavity molds
Hand Carved Picture-Cookie Molds
Preventing 'Release' Problems when using deep cavity molds
HOBI Cookie Molds
This page was last updated: July 1, 2021
USE OF WOODEN MOLDS: PREVENTING 'RELEASE' PROBLEMS
PAGE
17
PREVENTING STICKING...
1 - Dust the mold heavily with powdered sugar before the first use; dust lightly before each additional molding.
2 - Lightly dust surface of dough before impressing it with the mold. A "duster" (a spoon full of powdered sugar tied in a piece of cheesecloth) is handy!!
3 - Flour hands and subdivide entire recipe of dough into kneaded balls of the approximate size, which you will need to roll or press into the mold cavity. Coat each ball with a dusting of flour. Return most of the dough to the refrigerator to keep it chilled.
4 - Keep dough cold, work close to the refrigerator.
5 - If dough has stuck in a mold, remove it with a toothpick and/or moistened brush.
Never use a knife in an attempt to clean a wooden mold.
6 - Place the mold in the freezer prior to use.
7 - Avoid shaping dough when humidity is high.7
8 - You may need to use more or less flour in the recipe